
Back Up Your Hard Drive With Time Machine
Backing up your Mac is one of the easiest ways to protect your photos, documents and other important files.
Apple’s built-in Time Machine makes the process largely automatic. Once it’s set up, your Mac can regularly back itself up in the background without you having to remember to copy files manually.
What does Time Machine back up?
Time Machine backs up most of the information stored on your Mac, including:
- documents and folders
- photos and media libraries
- Mail and Messages data
- applications
- user settings
- many system settings
It also keeps older versions of files, which can be extremely useful if you accidentally delete something or make changes you later regret.
What you need
The simplest Time Machine setup uses an external USB or Thunderbolt drive connected to your Mac.
As a general rule, choose a backup drive that has significantly more capacity than the amount of storage currently being used on your Mac. More space allows Time Machine to keep a longer history of older files and backups.
If possible, use the drive primarily for Time Machine rather than mixing your backup with a collection of unrelated files.
How to set up Time Machine
- Connect your external drive to your Mac.
- Open Apple menu > System Settings > General > Time Machine.
- Click the + button to add a backup disk.
- Select the drive you want to use.
- Follow the instructions to finish setting it up.
macOS may need to erase or reformat the drive before it can be used for Time Machine, so make sure there isn’t anything important on the drive first.
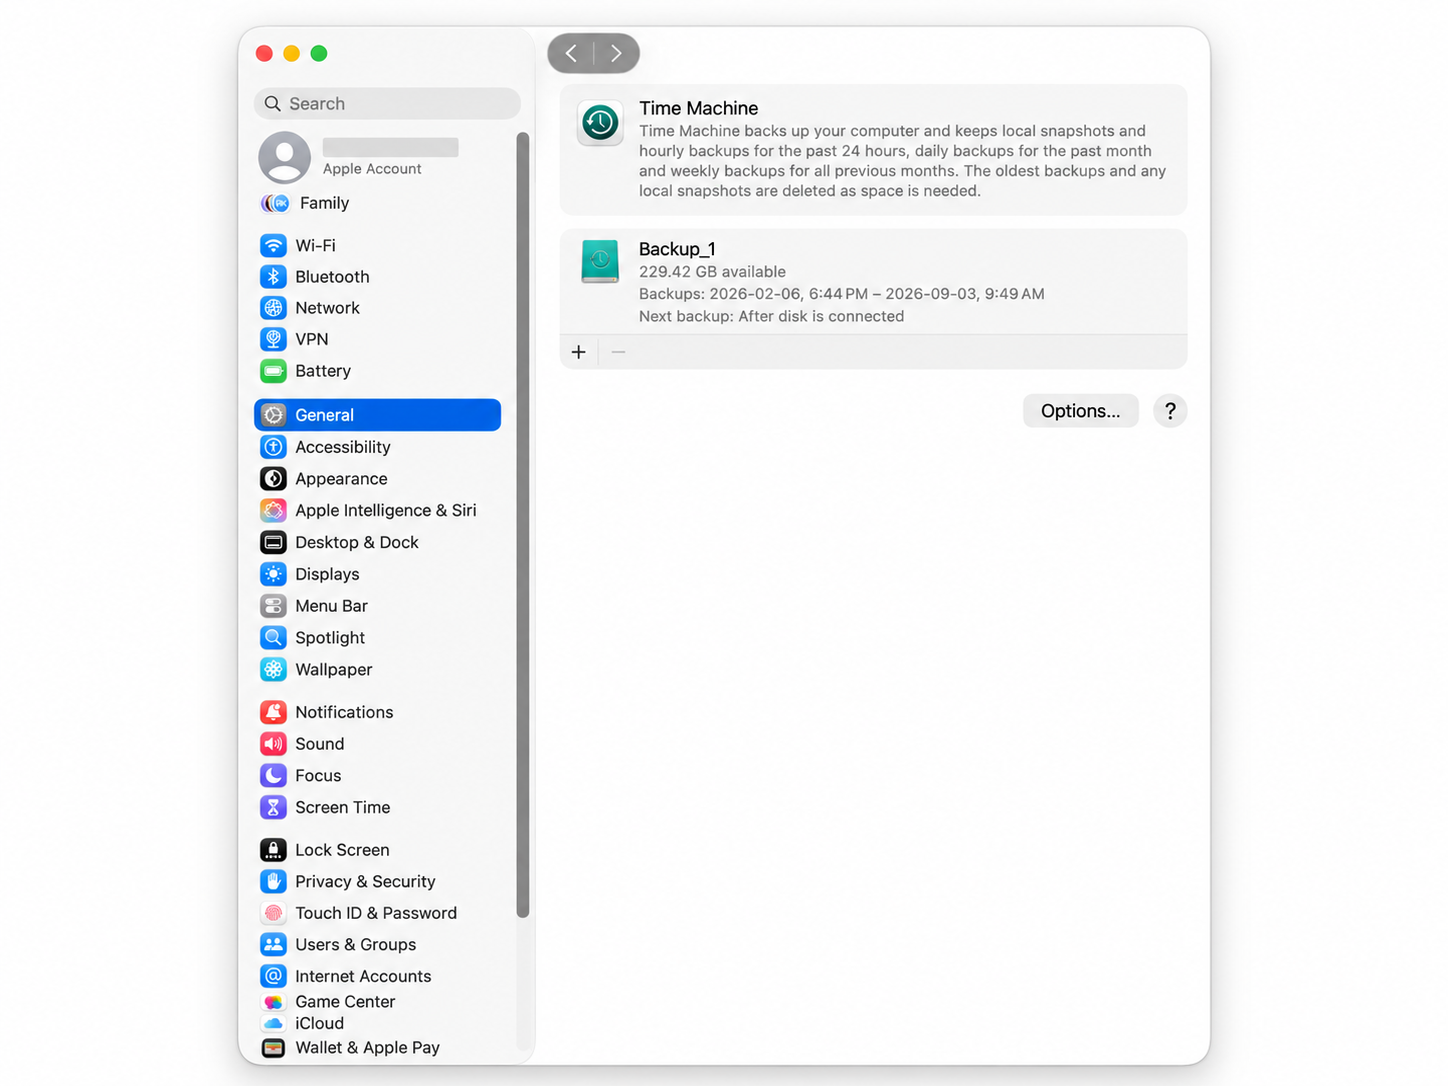
Let Time Machine do the work
Once Time Machine is configured, backups can happen automatically whenever the backup drive is connected.
The first backup may take quite a while because your Mac has to copy a large amount of information. After that, Time Machine generally backs up only what has changed, so future backups are much quicker.
Choose how often Time Machine backs up
Click Options in the Time Machine settings to adjust how often automatic backups are created.
Depending on your version of macOS, you can choose a backup frequency and decide whether a MacBook should continue backing up while running on battery power.
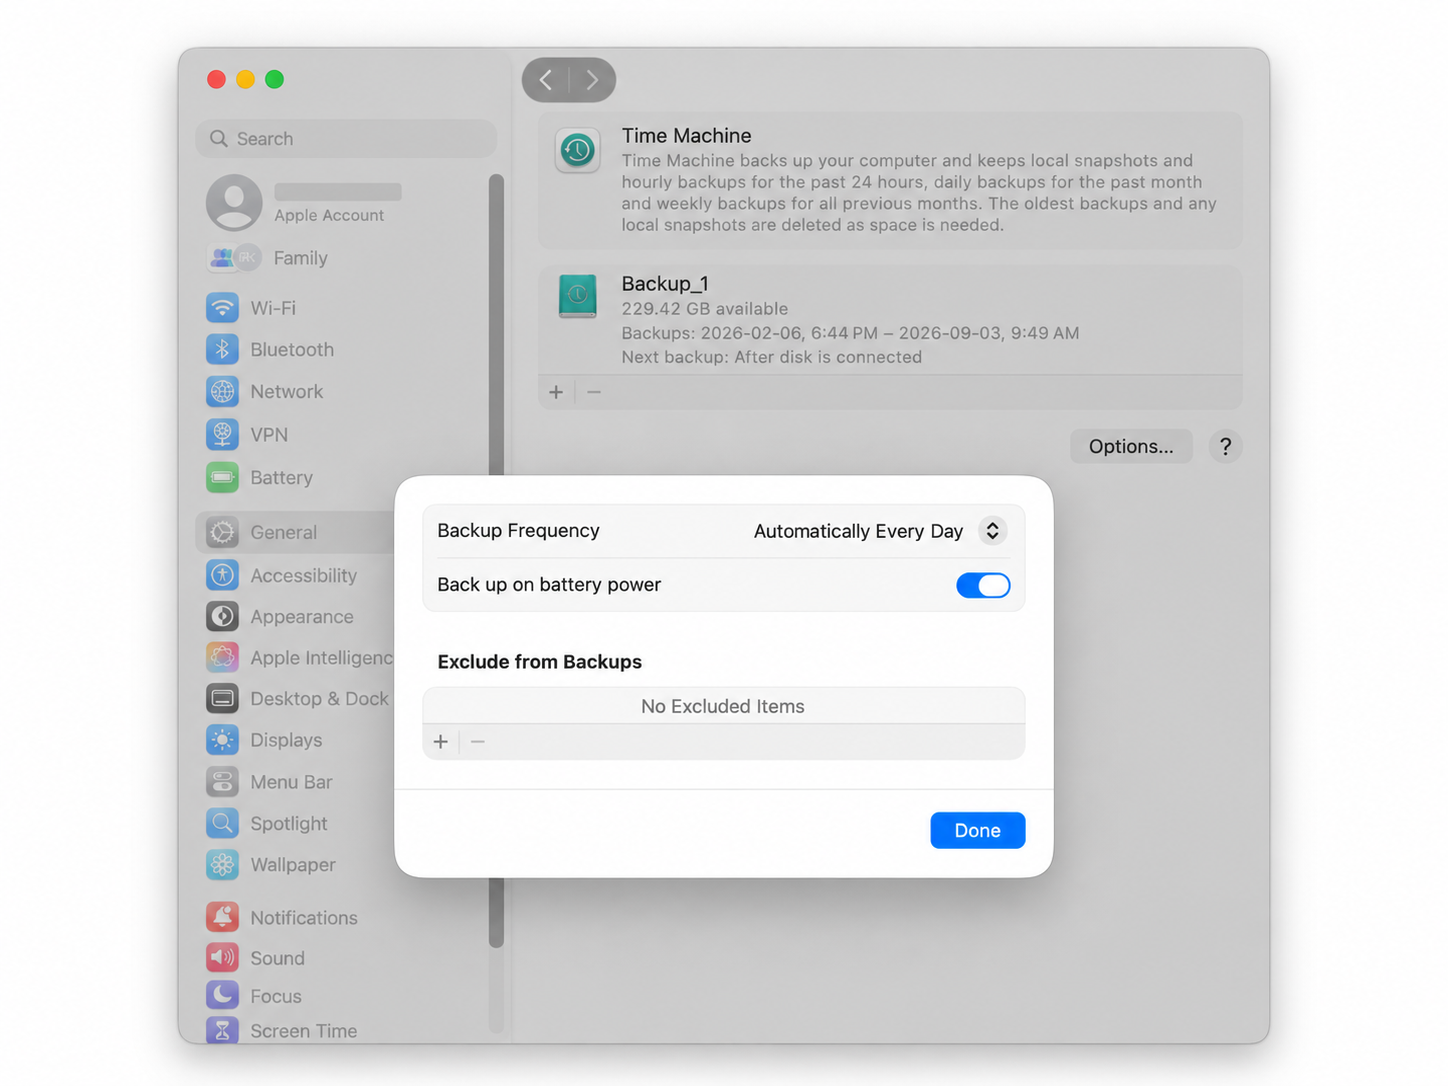
You can also exclude specific folders or drives from Time Machine. For most people, however, it’s best to let Time Machine back up as much of the Mac as possible.
Restoring a file you deleted
One of Time Machine’s most useful features is the ability to recover an older or deleted file.
Open the folder where the file was originally stored, then open Time Machine. You can browse through earlier backups and restore the version you want.
This is particularly handy when the Trash has already been emptied and the traditional moment of panic has begun.
What happens when the backup drive fills up?
You don’t normally have to manage old Time Machine backups yourself.
When the backup drive starts running out of space, Time Machine automatically removes the oldest backups to make room for new ones.
Keep the backup drive connected regularly
Time Machine can’t back up your Mac if the backup drive has been sitting in a drawer for six months.
Desktop Macs can usually leave the backup drive connected all the time. With a MacBook, connect the drive regularly and give Time Machine enough time to complete a backup.
One backup is better than none
Cloud services such as iCloud are useful, but syncing and backing up are not quite the same thing. If an important file is deleted or changed, that change may also sync to your other devices.
A Time Machine backup gives you another layer of protection and lets you recover earlier versions of your files.
Check your backups occasionally
Don’t assume a backup is working forever simply because you set it up once.
Open System Settings > General > Time Machine occasionally and check when the most recent backup was completed.
A backup that hasn’t run for months is mostly just an external drive with good intentions.
Need help setting up a backup?
If you’re not sure which backup drive to buy, whether Time Machine is working properly, or how to recover a lost file, Up Your Media can help.
We provide practical Apple support in Parksville, Qualicum Beach and throughout Central Vancouver Island.
Contact Up Your Media if you’d like help setting up a reliable backup for your Mac.